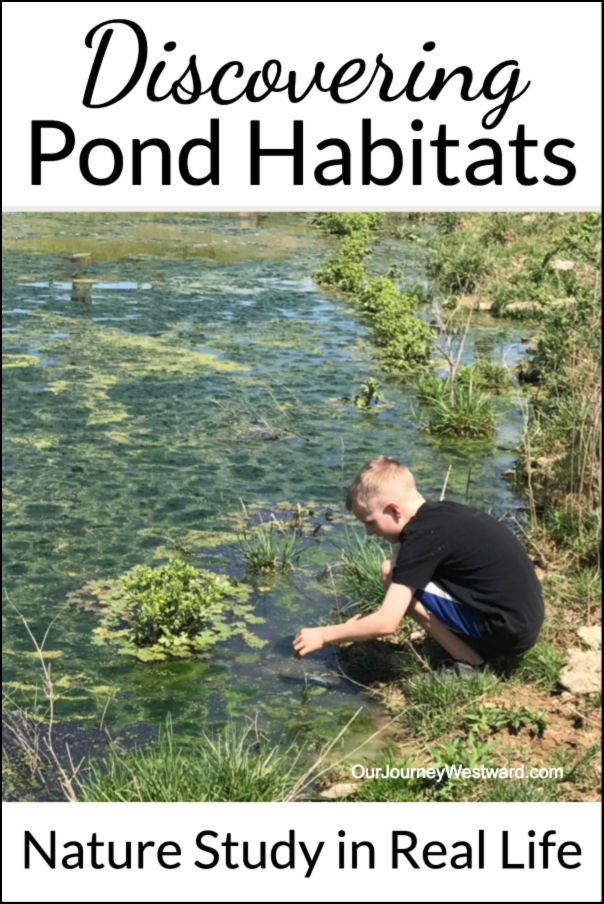
subscribe to the RSS Feed

Thursday, May 24, 2012

Human Body Systems

Posted by Cindy on March 20, 2012

Considering God’s Creation has been the spine curriculum for our 6th grade human body study.  As always, I added a few things here and there to amp things up a notch.  So, besides the {wonderful} notebooking pages that come with Considering God’s Creation, we did the activities and worksheets below, too.

Sadly, I don’t have links to most of the worksheets since they came from a folder of things I began collecting years ago as a teacher in the public school system.  Likely, you can search for similar freebie worksheets online.

Skeletal System – A large skeleton put together with brads helped Caleb practice matching bones to their names.

Circulatory System – A colored chart of the heart reinforced how oxygenated blood comes from the lungs and is pumped into the arteries from the left side of the heart, and how blood carrying carbon dioxide and other wastes comes in from the veins and is pumped into the lungs in the right side of the heart.

An activity and worksheet from the R.E.A.L. Science Odyssey Preview download strengthened his understanding of  blood contents.

A blood compatibility experiment allowed Caleb to decide what types of blood someone could safely receive if in need of a transfusion.

Nervous System - The Ectomy Game from Ellen McHenry’s Basement Workshop was a great addition to learning about the functions of various parts of the brain.

Digestive System - Along with a study of the digestive system, I had Caleb read a book on nutrition.  He also completed an experiment to see which foods contain fats, designed a day’s menu following the food pyramid guide, created a model of the teeth, and experimented with the effects of soda on tooth enamel.  (We used a cow tooth found on a nature walk.)

Respiratory System – Nothin’ special beyond Considering God’s Creation and a library book.

Muscular System – Well, the plan was to have a magnificent drawing of the major muscles.  This is what I got.  Ahem, someone was in a hurry to get outside to enjoy the unusually wonderful March temperatures.  At least he can name the muscles, right?

We also completed a muscular graphing experiment.  Caleb had to push a clothespin open as many times as possible within 20 seconds and note the results on a line graph.  He did this four times with only a moment’s rest between each trial.  The point (besides adding a little living math to the study) was to examine muscle fatigue.

Integumentary System – A stimulus response experiment showed us that nerve receptors in the skin can be fooled.

Endocrine System – Nothin’ special besides CGC and a library book.

Excretory System – Same here.

Reproductive System – And same here.

EVERY lesson always began with a book.

This bingo game from The Human Body Thematic Unit was a fun review of all the body systems.

I don’t often give tests, but I have to keep Caleb on his toes, so a test fit the bill after this unit.  It was actually quite simple to put together.  I just took a ton of workbook pages from The Human Body by Frank Schaffer, stapled them together, gave him a due date and slapped a grade on the packet.

Another unit bites the dust!

Cells and DNA

Posted by Cindy on February 27, 2012

During our human body unit, we spent quite some time studying cells – their functions and parts.  This discussion naturally led to a study of DNA and genetics.  What fun!

Cells

Understanding the basic formation of a cell began by using the model of an egg.  (Our worksheet came from the R.E.A.L. Science Odyssey preview download.)

The cell lesson and activity page from Considering God’s Creation helped us to understand each part of an animal cell and its function.

Cell pizzas (an idea from Journey2Excellence) helped us concretely review each cell part and its function.

  • Crust edge = cell membrane
  • Sauce & cheese = cytoplasm
  • Salami = nucleus
  • Mushroom = nucleolus
  • Onion = endoplasmic reticulum
  • Green pepper = golgi body
  • Red pepper = mitochondria
  • Pepperoni = vacuoles & centrioles
  • Olives = ribosomes & lysosomes

A simple review sheet from Crayola served as a “quiz”.

DNA

This YouTube video gave us a nice overview of DNA within cells.

We were so excited to learn more about DNA by working with the CSI DNA Build Kit.  Unfortunately, while it has the potential to be an awesome supplement to learning about DNA in a hands-on way, the delivery and follow-through of the activities is awful.  We were able to muddle through simply because I took a class on this topic in college and had a some background knowledge.  Sadly, I DO NOT recommend purchasing the kit.

After the DNA kit flopped, I felt like we needed a different activity to cement the idea of genetics.  I modified a fun activity from Science Matters to “see” how to build a Punnett square to show genetic possibilities.  Like the CSI kit, the directions for this activity leave something to be desired, but if you work through the lesson first on your own to work out the kinks, it turns into a nice teaching activity for your children.

As a “quiz” we completed a fun Sponge Bob Genetics activity.

Of course, we ALWAYS read books before, during and/or after our lessons!  WARNING: Realize that most biologists who have written books for children are evolutionists.  Especially on the topic of genetics.  Enjoy the good parts and be watchful of things you might want to censor.

Bean Classification

Posted by Cindy on January 3, 2012

Remember the candy classification post from a couple months ago?  My logic classes at co-op did a similar activity with 15-bean soup mix.

Before jumping into the activity, we talked about plant and animal classification.  I showed them a pictorial example of how animals are classified and then further classified until each animal is eventually in it’s own category.

Each student was given a small pile of beans – approximately 50-60 beans with at least one of every variety in the pile.  (I allowed my middle school group to work in teams of two or three students.)

I challenged them to create a classification system for their beans, making sure each bean ended up in its own category in the end.  They were asked to use any characteristics they wished to separate the beans, with only two rules:

  • use creative characteristics (not simply colors)
  • don’t break every bean down into its own group in the first step

With each new separation based on a new characteristic, they were expected to note it on a chart so that, in the end, they could tell me the full “taxonomy” of each bean.

Ex: Bean -> small -> round -> flat -> green -> split pea

Each classification chart was unique because each student (or group of students) began with different characteristics of separation.  So, when one person first separated the beans into large and small groups, another student might have used the categories of dark and light or oval and round.

I used this opportunity to discuss how Carolus Linnaeus “invented” the modern classification system of plants and animals in the 1700′s, but scientists even today don’t always agree about exact placements in the taxonomy.

We decided to create a “scientists roundtable”.  Everyone went around the table and told the first characteristic they chose to separate the beans.  If four out of five people (or groups) all used the characteristic of shape, we voted to make that the “official” first level of characterization.  If two people used one characteristic and three people used another, each person had to “argue” their case for using that characteristic and then we all voted as to the “official” characterization.  We continued through each level of the taxonomy in this manner until we came up with an “official scientist certified bean taxonomy”.

The kids all loved this activity!  Besides science and logic, it was a great lesson in chart making, debate and cooperation!

Fun with Leaves

Posted by Cindy on November 21, 2011

I {heart} Pinterest!  Seriously.  It may very well be the greatest invention on the planet.  Okay, the greatest recent invention.

Through Pinterest, I found (and archived) some fun leafy art lessons to go along with our botany studies this autumn.

While we didn’t get to all the wonderful ideas – this autumn – we found time for two of them.  The first was a lesson about layering oil pastels from Art Projects for Kids.

And the second was a fun shaving cream transfer painting from Little Wonder’s Days.

Speaking of botany, the last couple of weeks have been full of wonderful botany related field trips.

At Hallway Feeds, we were able to view the creation of specialized animal feed from start to finish.  What an amazing and utterly detailed process.  The kids were even allowed to EAT some of the feed!

At Color Point Nursery, we walked through state-of-the-art greenhouses and learned the process of growing and shipping plants on a very large scale.  At the time, there were 600,000 poinsettias set to ship out soon.  This place was huge!

I’ve lived in Kentucky my entire life and have never been to Churchill Downs.  My father-in-law owns a thoroughbred racehorse that happened to be racing at Churchill Downs last week.  Even though “our” horse came in 6th, we had a great time taking in all the sites and sounds – which can certainly count toward biology hours, right?

Enjoy your Thanksgiving week!

Pond Water Study

Posted by Cindy on November 5, 2011

What is this??  A bowl of wonderful, living pond water!

Even though you can’t see anything living with the naked eye, there’s a world of life waiting to see under a microscope!

Mahayla has been studying about the Kingdoms Monera and Protista in her biology.  And, as you know, Caleb has been studying all sorts of plants, including pond plants.  We were amazed at all the life we found in that small bowl of pond water!  If you have a microscope, create a few slides with “fresh” pond water and see for yourself!

When studying pond water, you might also enjoy the other activities suggested in the NaturExplorers study, Peaceful Ponds!

Photobucket