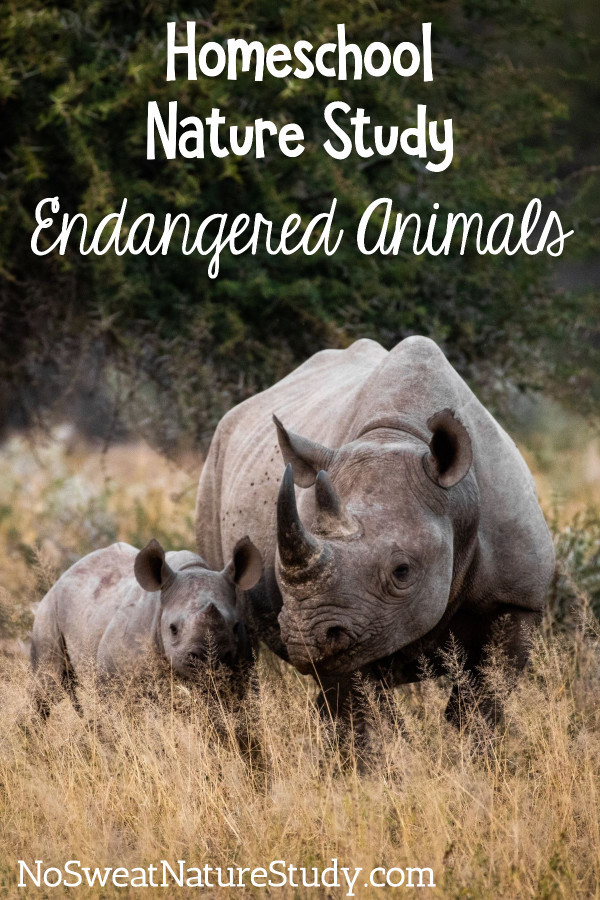
subscribe to the RSS Feed

Thursday, February 9, 2012

Conifer Study

Posted by Cindy on November 2, 2011

Caleb (and Eli) and I have been so loving our study of botany!  This post highlights one of our activities as we learned about gymnosperms, particularly conifers.

Gymnosperms are plants with “naked seeds” that aren’t housed inside a fruit.  Conifers (cone-bearing plants) are an example of a gymnosperm.

During this lesson, we had collected various twigs and cones from trees at our local cemetery.  We don’t have very many conifers at all on our farm, but the cemetery has several varieties.  We tried to only to collect specimens that had already fallen off the trees or seems to be part of a dying branch.

We compared the leaves of different trees. How were they alike/different? How were they attached to the twig?

We identified the parts and observed their characteristic and functions.

We pulled apart cones as an informal dissection. We were looking for seeds inside the cones, but all ours had already dropped their seeds.

Cones close in cold, wet weather to protect the seeds. We placed open cones in cold water and watched as they completely closed after a few hours.

Conversely, cones open in warm, dry weather. We set cones that were tightly closed in a 250 degree oven for an hour or so and watched as they opened completely.

While this wasn't part of the same lesson, our weekly art lesson used conifer samples as models for some practice with pastels.

If you’d like to find all sorts of detailed lesson ideas for studying conifers, check out the NaturExplorers study, Constant Conifers!

Photobucket

Studying Trees

Posted by Cindy on November 1, 2011

In continuing our middle school botany study, we’ve been studying trees.  A lot.  Most of the activities we’ve done have come from the Delightful Deciduous Trees NaturExplorers study.

One super-interesting nature walk activity was finding the tap root (main root that grows straight down), lateral roots (large roots that grow outward or laterally) and fibrous roots (fine roots that grow downward from the lateral roots) of trees.  We took a walk near a creek where we were likely to see root systems due to erosion.  Our findings were way cool!

Exposed roots were everywhere making it easy for us to make plenty of observations.

As we walked the dry parts of the creek bed, we were able to find shelves of erosion showing grass and wildflower roots from above, too!

(The Everchanging Erosion NaturExplorers study would be great for this topic, too.  I’m just sayin’.  ;) )

After plenty of experiences along with lots of living science literature, I gave Caleb a “test” of sorts.  He had to complete the file folder report below to prove his knowledge of trees.  (The file folder template came from Easy File Folder Reports, Grades 3-6.)  As a review before the “test”, I had him read a wonderful little book called A Tree is Growing by Arthur Dorros.

And I can’t forget the ever-so-interested preschooler who loves to be part of our botany lessons.  He gathered some leaves on our walk and created some simple, but pretty, leaf prints when we returned home.

Pumpkin Math

Posted by Cindy on October 31, 2011

I know I’m a little late in posting this, but the month of November is still perfect for some pumpkin fun! 

Actually, I’m a little late in posting a lot of things.  My goal this week is to polish and publish as many posts as I can before The Heart of the Matter’s 10 Days of …. Series begins next week.  Did I mention I was taking part in that again?  I know I mentioned it on my Facebook page, but just in case you missed it, I’ll be writing TEN days of posts on the topic of Values Training beginning next Monday, Nov. 7th!  There are lots of wonderful blogs participating, each with exciting topics!

Anyway, off to today’s post – a living math lesson with pumpkins!  All our children participated according to their abilities – from the 4yo to the 14yo.  The 11yo and 14yo were expected to measure with complete accuracy, while the 4yo dabbled in learning how to measure.  He used standard (rulers) and non-standard (blocks) measuring tools.

We measured the height and width of each pumpkin.

We measured the weight with our bathroom scale. A nice kitchen scale (which we don't own) would've provided more accurate measurements.

We measured the circumference and the big kids used formulas to determine the diameter and radius.

Here's the beginning of Mahayla's record keeping.

When Eli saw his big brother and big sister keeping records, he insisted that he have a record keeping sheet, too. W = wide and T = tall.

We did a water displacement activity to find the volume of our pumpkins (you'll see below), but we didn't have a big enough container marked with measurements to make the pumpkin displacement accurate. To demonstrate the correct way to find volume, we used a measuring cup and potato. At least this gave them a better idea what we were doing wrong in measuring the volume of our pumkins.

In measuring the volume of our pumpkins, we made our own measurement bucket for estimations, but realized our measurements probably were not perfect, nor could we see through the bucket to see exact water levels. At least they have the experience and understand the flaws in our trial.

Of course, we couldn't end the lesson without carving our pumpkins! Through this process, we continued to measure width of the skin, depth of the cavity, and such. We also talked "science" as we discussed the pumpkin parts and their functions.

And, we couldn't end the lesson without a pumpkin treat. These are simple pumpkin bars that are so moist, they don't even need icing!

I hope you’ll find a few leftover pumpkins at the market and have your own living math lesson!

Teaching Computer Skills

Posted by Cindy on October 27, 2011

Children of the 21st century simply must be knowledgeable about and capable with computers.  Besides typing programs and internet research,  I like to assign occasional projects that are computer-based.  I thought you might like to see the most recent projects…

Writing is something that Caleb does NOT like.  But, when the writing is (at least somewhat) hidden, I get way fewer complaints!  Using the newsletter program that came with Office 2010, I asked Caleb to create a keepsake page about his summer’s experiences with baseball.  Besides the obvious skills of writing and word processing, he practiced page design and inserting photos and clip art.  (There was a little more on the bottom of the page, but it included personal info that I didn’t care to share, kwim?)

Mahayla was given an assignment to create an informational newsletter about horses.  The topic was her choosing and I was completely floored by her final product.  What you see below is only the first of a two-page newsletter.  I couldn’t figure out how to copy the 2nd page as a jpg!

Just this week, Caleb has been learning about non-vascular plants during science.  We went on a fungi photo walk where he was supposed to find as many fungi as possible to photograph.  (We found more than 20 varieties!)  I asked him to create a notebooking page about the fungi using some of the photos  from his walk.  This proved to be a great learning opportunity for him in science, writing and computer skills – typing, fonts, tables and inserting images.

How do you use computers in your homeschool?  I’d love to see some of your projects!

By the way, now is the perfect time for studying fungi in most parts of the USA.  Check out A Fungus Among Us!

The Study of a Twig

Posted by Cindy on October 20, 2011

We’re still having fun with Caleb’s botany study.  One recent topic was fascinating for both of us…understanding a twig or branch.

We first learned about the terminal bud, which is the bud at the end of the twig where new growth (called the shoot) will grow from next spring.

Terminal bud scars circle the twig. These show branch growth from year to year.

Lateral buds, found all along the branches, develop just above where leaves are (or were) attached. Side shoots (otherwise known as new branches) will grow from these buds in the spring.

You can clearly see the new twigs that began growing from lateral buds on this dead branch. Above the shoot on the left side, you can also observe a leaf scar formed when a leaf fell off the branch.

We also learned that leaves grow in various patterns. They can grow alternately, like the leaves pictured above, or they can be whorled (in a sort of circle) or opposite each other on the branch.

Caleb spent time measuring the distance between bud scars, lateral buds, and more.

We also had fun with an old Native American practice of measuring the height of trees. While not completely accurate, it is fun. You hold on to your ankles and walk away from a tree until you can see the top of the tree through your legs. Then, you measure from that place back to the tree. The measurement should be approximate to the height of the tree.

Botany and nature study can be so much fun, even if you never go any farther than your back yard!